Hello! So in this post, I’m going to show how to deploy a Mellanox switch with the latest firmware installed using Canonical’s Metal-As-A-Service, or MAAS. It’s actually pretty easy since with the latest release, 16.10, it has SwitchDev already enabled. There are just a few little things you need to do to make this deployment a much easier thing.
The point of this article is so that you can install your Mellanox switch, connect it to your MAAS managed network, and deploy the switch and it will be ready to go.
First thing you need to do is on the MAAS server, add a tag. This tag will make use of the “kernel_opts” meta tag so that we can use the console on the device. By default, MAAS wants to use tty and ttyS0, which is fine most of the time, but because Mellanox uses Console redirection, we have to include the baud rate and other settings otherwise we get no displayed output. This is easy enough. Log in to your MAAS server, and login to the MAAS CLI.
NOTE: I like to export my API Key in my home directory so I don’t have to type it. I’ve seen some people make it an env variable so that they can just call it with a $APIKEY variable, either way, you can do this with the following command to make it easier to login:
sudo maas apikey --username $USER > maas.apikey
Now, you can login to the MAAS CLI:
maas login default http://maas/MAAS `cat ~/maas.apikey`
Now you can create the tag for the switch’s console:
maas default tags create name='serial_console' comment='115200 serial console' kernel_opts='console=ttyS0,115200n8'
You can add as many other tags and kernel_opts as necessary for each different switch you want to have managed by MAAS.
Next, we have to download Ubuntu Yakkety Yak into MAAS if you don’t already have it. To do this, go to the Images tab in the MAAS WebUI, check the 16.10 checkbox and click Save Selection. After a few moments MAAS will download the image and you’ll be able to use it to deploy systems with. After you save selection, you can move on to the next step since by the time you’re done with it, MAAS will have downloaded the image and you’ll be ready to deploy.
Now, you are ready to have the switch be provisioned by MAAS. Plug in the switch to a managed power supply that MAAS can manage. I use DLI’s PDU in my home lab with great success. Just make sure it is configured properly so that MAAS can use it. If you have any questions about this, leave it in the comments and I’ll reply back.
Login to the PDU’s web interface and turn on the switch. Make sure you have the console cable connected to either a laptop or a serial concentrator that you can access to watch the device come up. You have to get into the BIOS to change the boot order. By default the Mellanox switch boots to the installed hard drive since it comes with ONIE pre-loaded on it. This will cause the system to never boot via PXE, which is what MAAS needs for it to work. When you get the AMI BIOS screen press CTRL-B, there is no prompt, you just press it and it will take you into the BIOS. Under the Boot tab, move the P0:InnoDisk to the third option and make sure that the Intel GB NIC’s are first and second. Then Save and Exit the BIOS and it will reboot the switch. You will get two PXE BIOS boot messages, one for each NIC, then the BIOS display again, then you get the familiar PXE Boot process. The device will hit MAAS and start the Provisioning. You will get no display on your console, but when it is finished, you will hear the fans over speed and get a red Fault indication on the device. Since MAAS tries to power down the device with the shutdown command, and there is no power off with a switch, it goes into a faulted state. From the PDU interface, shutdown the switch. Go to MAAS and you will see your device there in a NEW status. You need to adjust the power for it, so click on it in the MAAS WebUI and scroll down to Power. Put in the Power information for the device.
NOTE: If you are using the DLI PDU, you will get no power indication. This is by design. For power status, you will have to look at the PDU web interface or look at the switch and verify it is on.
Once you have the power setup for the switch, Click on Edit for the tags selection and put in serial_console (It should auto-populate as you type it) and click save. Now you are ready to commission the switch. From the Task pull down, select Commission. The switch will power up and start to boot up. NOTE: You may want to watch this since sometimes I have seen it change the boot order back to hard drive after the faulted state. If it does, just go back into the BIOS and change the boot order back to PXE. After you commission the device, this seems to not happen anymore.
After commissioning, You will have a Ready state in MAAS. You are now ready to deploy the switch. Click on the switch, and select Deploy from the Task pulldown. You will be given the option of what Operating System and version to install on the device. Select Yakkety Yak and click Deploy. You can watch the device come up, install and deploy. After the reboot, you will have a deployed switch. You can login to the device via SSH with the ubuntu@device-name. I highly recommend adding a local user account with password on the device so that you have a way to get into the device locally if your management network ever goes down and you need to configure the device.
The last thing you have to do is add udev rules so that the front panel gets the correct names for the device. This is just like with the switchdev in Ubuntu-Core on the switch. First you need the get the switchid. To do that run the following command:
ip link show dev eth0 | awk '{print $9}'
The output is the switch id. Note that since you will need it for the udev rule. Now we need to create it. To do that, login to the switch and run:
sudo vi /etc/udev/rules.d/10_custom.rules
and enter the following
SUBSYSTEM=="net", ACTION=="add", ATTR{phys_switch_id}=="<switch-id>", ATTR{phys_port_name}!="", NAME="sw1$attr{phys_port_name}"
<switch-id> is the value you got from the previous command/step.
Reboot the switch and verify that the interfaces are named properly:
ip link show dev sw1p1
You should get the following:
34: sw1p1: <BROADCAST,MULTICAST> mtu 1500 qdisc noop switchid 7cfe90f02dc0 state DOWN mode DEFAULT group default qlen 1000

link/ether 7c:fe:90:f0:2d:fd brd ff:ff:ff:ff:ff:ff
At this point you are ready to setup your device as you see fit using standard Linux commands.
Please let me know if the comments if you have any questions.
Thanks!

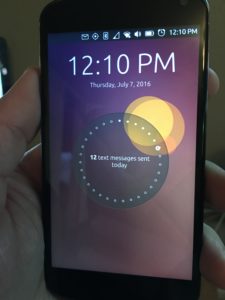
 40 T-Mobile SIM card for my Ubuntu Phone. I plugged the SIM in and after going online to activate it, I had a working phone with unlimited text, calling and data. First thing I did, transfer all my contacts over to the Ubuntu Phone. Took a while since they were not in Google, so I had to convert the contacts from iPhone to Google, and then boom. I had them all.
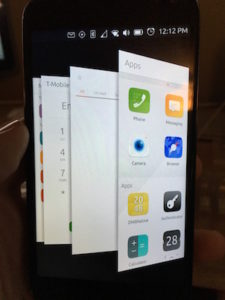
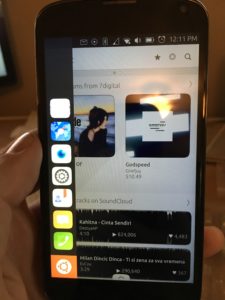
 em, swipe them up (which, in my opinion, I think Apple stole from Ubuntu since they did it first… just sayin’), and then I could get to my Dock by swiping right and all my favorite apps are there, messaging, email, navigation, phone, calendar, the App Store, Scopes, which is what the main screen is on the Ubuntu phone. All my m
 have to say, and not because I’m paid to, I actually am going to miss the Ubuntu Phone. I will still have it, and use it for testing and when I go over seas on trips since it works better then having to get a new SIM for my iPhone and having to have it unlocked for it to work, but I may actually flip for a new Ubuntu Phone when my contract with Verizon on my iPhone expires. It worked great as an emergency phone so that people could get a hold of me, and so I could keep in contact with friends and family. I’m hoping that by 2018, the Ubuntu phone matures, and hopefully will be available in the United States by a major carrier, but if not, I’ll definitely buy the phone, put a SIM in the phone and if the app doesn’t exist for it yet, I’ll build it.