Hello everyone! I had my iPhone stolen at a baseball game I went to on July 3rd. Because it was a Sunday, and the next day was a holiday in the United States, I was told I would get my replacement on Tuesday the 5th. I couldn’t wait that long to be incommunicado, so I went to Best Buy with my gorgeous girlfriend and she bought me a $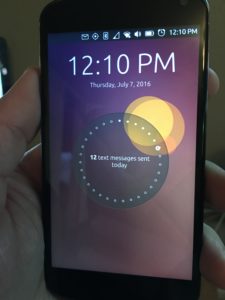 40 T-Mobile SIM card for my Ubuntu Phone. I plugged the SIM in and after going online to activate it, I had a working phone with unlimited text, calling and data. First thing I did, transfer all my contacts over to the Ubuntu Phone. Took a while since they were not in Google, so I had to convert the contacts from iPhone to Google, and then boom. I had them all.
I also had to get used to the swipe motions. And I needed to update the phone. It was running OTA 9, which is what it updated to the last time I used this phone which was when I was in Spain for the Network Developers Conference back in February. So my phone updated to OTA 11, and, GPS broke. After reading online how to fix it, I had to flash my phone to another build. I did that, and now I had working GPS. Life is great again… sort of.
So, I had to setup my email again, I used the Dekko Mail App that came on the phone to do that, which was quite easy to setup, in fact, it was easier on it than what I remembered on my iPhone mail app. Also, GMail was installed by default, so getting my work email was a snap, other than, I had no 2 factor authenticator for work. Luckily, Ubuntu has an app for that. In to my rescue came Authenticator, which all I had to do was work with our IS team to get me a temporary key, login and take a picture of my QR code on my screen with the app, and I was able to use it as my 2-factor device. So now I can use my phone for work and play and everything is all unicorns and cinnamon toast. Not quite. I needed an IRC app, which unfortunately, we don’t have Quassel as a client in our store. We have many other great options, which most I have used, but I have my own Quassel Core server and I just wanted to connect to that instead of connecting directly to our IRC servers. Plus I like looking back in the history to see what I may have missed of if my questions got answered by someone in another time zone while I was asleep.
I figured, I would try to make it into an app and if it worked, upload it to the Ubuntu Store. So, after work yesterday, I downloaded the Ubuntu SDK IDE, took a crash course in CMake, and started working on porting just the Quassel Client to the Ubuntu phone. Needless to say, 6 hours later, and many beers, I had the code compiled for ARM, and it worked on ARM versions of Ubuntu, but I never could figure out how to make it into a Click package that the phone uses. I would have hacked on it some more, but then, today at 9:58am, my replacement iPhone came! So, I’m going to put this little side project on hold.
So, I take my phone out, call Verizon using my Ubuntu Phone, which btw, works like a champ for everything else. Navigation, searching, Facebook, calls, texting, and best yet, you plug the phone into a monitor via the microUSB cable and connect a bluetooth keyboard and mouse to it, you have a desktop computer running Ubuntu Touch. BAD M$%^&ER F#@!%ING ASS!! That was by far, the coolest feature I had on this little Nexus 4 phone. My computer was in my pocket! I digress however, back on to my new iPhone. I get it, plug it in to my Mac, and it starts restoring my phone. 2 hours go by, it is finally done restoring, and updating everything and it is working like I never lost it. However, just in the 4 days I was using my Ubuntu Phone, I forgot how to use an iPhone! I got so used to swiping left to switch between running apps, to kill th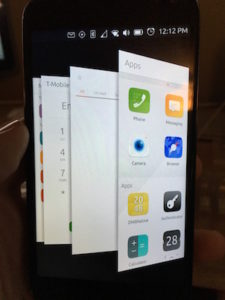 em, swipe them up (which, in my opinion, I think Apple stole from Ubuntu since they did it first… just sayin’), and then I could get to my Dock by swiping right and all my favorite apps are there, messaging, email, navigation, phone, calendar, the App Store, Scopes, which is what the main screen is on the Ubuntu phone. All my m
edia, movies, interests, what is going on around me, all on my home screen for meto scroll through.
So, what am I getting at? Well, I 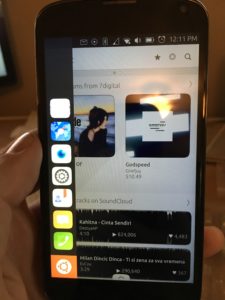 have to say, and not because I’m paid to, I actually am going to miss the Ubuntu Phone. I will still have it, and use it for testing and when I go over seas on trips since it works better then having to get a new SIM for my iPhone and having to have it unlocked for it to work, but I may actually flip for a new Ubuntu Phone when my contract with Verizon on my iPhone expires. It worked great as an emergency phone so that people could get a hold of me, and so I could keep in contact with friends and family. I’m hoping that by 2018, the Ubuntu phone matures, and hopefully will be available in the United States by a major carrier, but if not, I’ll definitely buy the phone, put a SIM in the phone and if the app doesn’t exist for it yet, I’ll build it.
Lates all, I’m going to put my Ubuntu Phone back in its case until it comes to my rescue again.